This is a detailed tutorial on HDR Photography for beginners and how you can create HDR images from single or multiple photographs using different exposures.
While I was driving through Rocky Mountains last year, I saw a beautiful sunset. It was so beautiful, that I stood there in awe for a moment, before taking out my camera and attempting to take a picture. I took one quick shot of the sunset and quickly realized that there was too much contrast between the sky and the mountains for my camera. The image came out horrible – the sky looked somewhat fine, but the mountains were pitch black. I only had my camera and my trusty tripod with me, so I knew that I did not have many options. I decided to try out a photography technique known as “HDR” or “High Dynamic Range” and I ended up with the following image:

Combined in Software
NIKON D700 @ 50mm, ISO 200, 1/10, f/16.0
While some people really like the above image, others just hate it. That’s how it goes with HDR in general – the surreal look of HDR photographs is not for everyone to love and enjoy, although, there are cases when it is done extremely well. But let’s save this discussion for later and first try to understand what HDR photography is all about.
One thing that you should always keep in mind while taking pictures, is that your camera does not have the same capabilities as your eyes when it comes to seeing both bright and dark tones in a scene. Our eyes are equipped with the most advanced technology, allowing us to see and perceive colors and tones no human-made electronic device can even come close to. This range of tones and colors is known as “dynamic range” in photography, which has become a key performance metric on modern digital camera sensors – the more dynamic range, the better the sensor.
If you have been using a digital camera for a while, you most likely ran into a similar situation as the one I described above, where you would take a picture and parts of it would either be too bright or too dark. No matter what settings you tweaked on your camera, nothing would seem to help, despite the fact that your eyes were seeing everything just right. If you switched your camera to manual control, you could brighten up one area, which would darken another and vice-versa, but no settings would correctly expose both, all due to the large dynamic range of the scene.
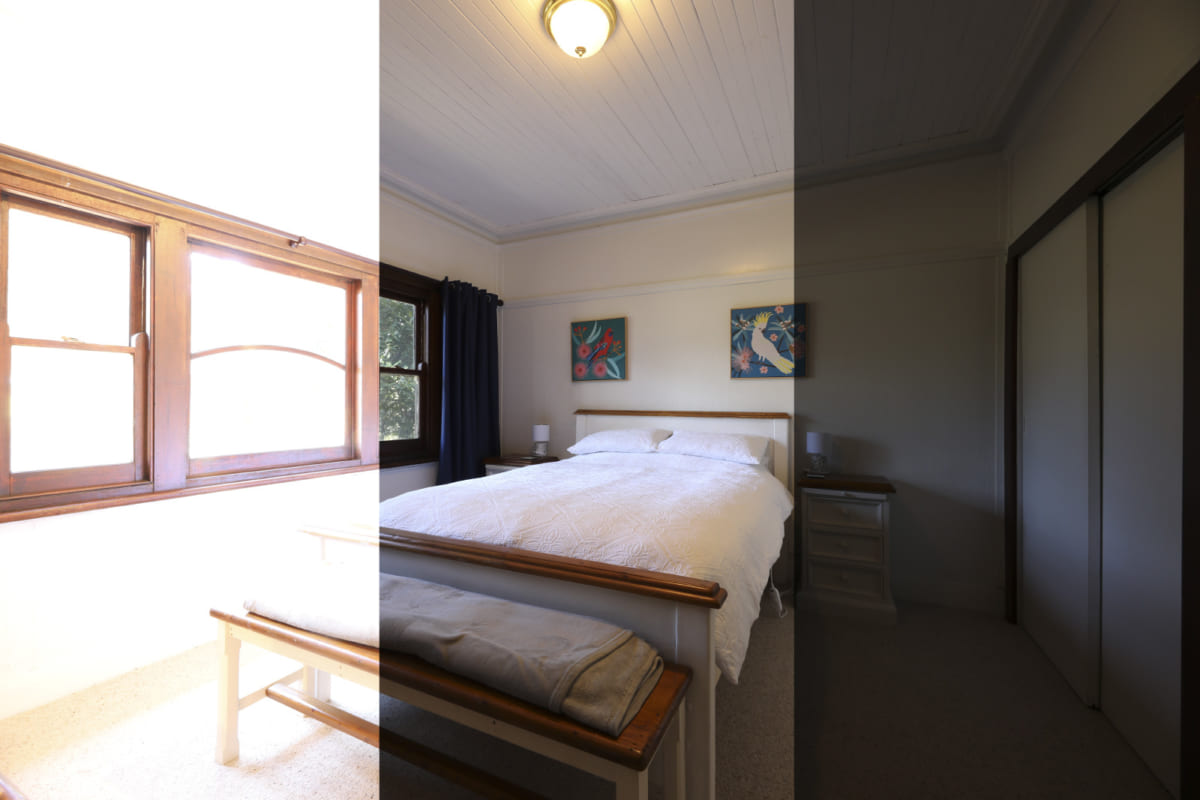
I tried to do the same with the above image and ended up with the following two photographs:
Metered to Sky Metered to Ground
The left image shows that while I was able to correctly expose the sky, the ground turned out too dark for me to be able to recover any details from it. In the second image, I tried to correctly expose the ground, but ended up completely blowing out the sky. It was clear that my camera, despite having an advanced full-frame sensor, was unable to capture such a large dynamic range.
But what if I captured an underexposed, normal and over-exposed images of the same exact spot and then combined them together into one image, where everything is properly exposed? That’s exactly how HDR works.
HDR Image
1) What is HDR?
HDR or High Dynamic Range Photography is a post-processing technique that uses multiple images of the same scene shot at different shutter speeds to combine them all into a single photograph. The result is an image with the most amount of detail in both shadow and bright areas of the image, close to what the human eye would see. Although it is ideal to use multiple images of the same scene, you could also create an HDR image from a single image, as long as it is shot in RAW format. Hence, there are two methods of creating an HDR image: a) from a single image and b) from multiple images. In this article, I will show you how to do both.
Pool
Nikon D700 @ 16mm, ISO 200, 1/125, f/10.0
2) HDR Requirements
In order to generate an HDR image, you need to have the following tools:
Digital camera (preferably a DSLR)
Tripod (for multiple exposures)
Adobe Photoshop or some other image-editing tool
Photomatix Pro or other HDR software (optional)
Noise Reduction software like Nik’s Dfine or Noise Ninja (optional)
Although you could get away without a tripod by shooting hand-held in brackets and let HDR software automatically align the images, I still recommend shooting with a tripod to get the best results. Aligning images works most of the time, but you would lose a portion of the image.
Water Wheel
NIKON D700 @ 36mm, ISO 100, 6/10, f/22.0
In terms of HDR software, you can use Photoshop’s built-in HDR functionality or third party applications like Photomatix Pro. I personally prefer to work with Photomatix Pro, because it offers much more functionality than Photoshop and is very easy to use, once you understand how to work with it. There are some other tools out there (including free & open source), but they are nowhere close to what Photomatix Pro can offer.
3) Camera Settings
For best results, I highly recommend to do the following:
Shoot in RAW. See my RA
